WireGuard

I’ve been using OpenVPN for a few things and I’ve been very interested in setting up WireGuard instead as it has a lot less overhead and is less cumbersome than OpenVPN. Well I finally took the plunge last night and it was surprisingly easy after only a few missteps!

One of my use cases is to tunnel all traffic to the VPN server, so it appears as if my internet traffic originates from the VPN server. Here is how I set it up (with thanks to a few other articles).

On the Server (Ubuntu 18.04 LTS)

Install WireGuard on the server. I am running Ubuntu 18.04 and so I had to add the repository.

Move to the /etc/wireguard directory (you may need to sudo su)

Generate the public and private keys by running the following commands. This will create two files (privatekey and publickey) in the /etc/wireguard so you can re-reference them while building out the config.

$ umask 077  # This makes sure credentials don't leak in a race condition.
$ wg genkey | tee privatekey | wg pubkey > publickey

Create the server config file (/etc/wireguard/wg0.conf). Things to note:

  1. The IP space used is specifically reserved for a shared address space per RFC6598
  2. I only care about IPv4. It is possible to add IPv6 address and routing capabilities into the configuration
  3. For routing, my server’s local interface name is eth0.
  4. You can choose any port number for ListenPort, but note that it is UDP.
  5. Add as many peer sections as you have clients.
  6. Use the key in the privatekey file in place of <Server Private Key>. Wireguard doesn’t support file references at this time.
  7. We haven’t generated the Client public keys yet, so those will be blank.
[Interface]
Address = 100.62.0.1/24
PostUp = iptables -t nat -A POSTROUTING -o eth0 -j MASQUERADE
PostDown = iptables -t nat -D POSTROUTING -o eth0 -j MASQUERADE
ListenPort = 51820
PrivateKey = <Server Private Key>

[Peer]
PublicKey = <Client1 Public Key>
AllowedIPs = 100.62.0.2/32

[Peer]
PublicKey = <Client2 Public Key>
AllowedIPs = 100.62.0.3/32

Test the configuration with wg-quick

root@wg ~# wg-quick up wg0
[#] ip link add wg0 type wireguard
[#] wg setconf wg0 /dev/fd/63
[#] ip address add 100.62.0.1/24 dev wg0
[#] ip link set mtu 1420 up dev wg0

Remove the interface with wg-quick

root@wg ~# wg-quick down wg0
[#] ip link delete dev wg0

Use systemd service to start the interface automatically at boot

systemctl start wg-quick@wg0
systemctl enable wg-quick@wg0

To forward traffic of the client through the server, we need to enable routing on the server

echo "net.ipv4.ip_forward = 1" > /etc/sysctl.d/wg.conf
sysctl --system

On the Client (Android)

  1. Install the WireGuard App from the Play store
  2. Open the app and create a new profile (click the +)
  3. Create from scratch (you could move a pre-created config file too)
    1. Give the interface a name
    2. Generate a private key
    3. Set the address to the address listed in the peer section of your server config – 100.62.0.2/32
    4. (Optionally) Set DNS servers as your local DHCP servers will no longer work as all packets will encrypted and sent across the VPN
    5. Click Add Peer
      1. Enter the Server’s public key
      2. Set Allowed IPs to 0.0.0.0/0 to send all traffic across the VPN
      3. Set the endpoint to the IP address you’ll access the server on, along with the port (i.e. <InternetIP/Name>:51820)

Revisit the Server Config

Now that the client has a public key, you need to update /etc/wireguard/wg0.conf

[Peer]
PublicKey = <INSERT PUBLIC KEY>
AllowedIPs = 100.62.0.2/32 

Restart the wireguard service

systemctl restart wg-quick@wg0 

Connect to the Server from the Client

Within the wireguard app, enable the VPN.

You can validate by visiting ipleak.net to verify that traffic is going through the VPN.

Edge Beta to Stable

As you may know, the new Edge based on Chromium went stable last week. Unfortunately, there is no automated way to move any of your settings from the Beta channel to Stable. That means, for those of us that were using the beta, you need to re-setup everything in stable.

However, as it is based on Chromium, all the information is stored in a profile (or multiple profiles). That means you can move all your profile data from the Beta folder to the stable folder. I did this and the only issue I ran into was if you run multiple profiles that use custom images, the taskbar profile icon will retain the “BETA” tag as those icons are generated during profile creation and stored in the profile location. Unfortunately, deleting the icon in the profile folder does not seem to reset the icon.

Stable Microsoft Edge
%LocalAppData%\Microsoft\Edge\User Data

Microsoft Edge Beta
%LocalAppData%\Microsoft\Edge Beta\User Data

UPDATE – If you have edge profiles assigned to a Microsoft account where your image is from O365 or another account, I found a way where you can regen the taskbar icons after doing the above steps.

Just go to edge://settings/profiles and sign out of the account and then sign back in and it will recreate the profile icons. Make sure you do not check the box to clear all your settings though! For profiles not linked to a Microsoft, just change the profile image.

Tada!

Backup Decision

Tl;dr, I’m using Duplicacy with the new Web UI. This is hosted in a docker image, and currently pushes data to an Azure storage account.

Also, wow, just had a slight heart-attack while writing this as I removed Docker from my NAS, which blew away a whole share of my Docker data (14 different containers including all my NextCloud personal files!). They were all backed up with Duplicacy, and while I had tested it before with a few files, you never know. It wasn’t as painless as I’d like – partially my fault with mounted drives to the container read only, partially the GUI isn’t super great yet, and really that Azure connections continually getting reset and the underlying CLI doesn’t account for that – but it’s all back and humming along again. Phew!

Options Considered

I’ve only included the main contenders below. In particular, I was interested in using non-proprietary storage backends that allowed me multiple options (B2, AWS, Azure, etc). The ones that were quickly removed and not tested:

Now for the ones that were tested.

CrashPlan

CrashPlan has served me great for a large number of years. I have used it from two different continents successfully. There are definitely some good things about it: continuous backup, dedupe at the block level, compression, and you can provide your own encryption key. However, with the changes awhile ago (and continual changes I get emailed about), I knew it was time to look for other options. Plus, even with 1 device, it was going jump from $50/year to $120 – while not horrible, definitely a motivator.

Synology’s Hyper Backup

I store most of my data on my Synology NAS, and it comes with some built in tools (Glacier Backup, Hyper Backup, and Cloud Sync). I actually was running CrashPlan in a docker image on the NAS prior to doing this assessment. Of the 3 tools, Hyper Backup was really the only one I consider as Glacier is for snapshots and Cloud Sync isn’t really a backup product. For Hyper Backup, you can backup to multiple different storage providers, including Azure which was my preferred. Like CrashPlan it can do dedupe at the block level, compression, and allows you to specify your own encryption. Unlike CrashPlan it isn’t continuous (can do hourly), will send failure emails, and won’t automatically include new folders in a root if only some of the subfolders are selected. The service is free, you only pay for the storage you use.

Duplicati

With Duplicati I ran it from a docker image on my NUC. This meant I had access to some files that Hyper Backup could not access, which was good. Plus, you can backup to multiple different storage providers including Azure. Like CrashPlan it can do dedupe at the block level, compression, and allows you to specify your own encryption. Unlike CrashPlan it isn’t continuous (can do hourly), and I was getting lots of errors when adding new folders. Plus the database is notorious for becoming corrupt, which is not something you want with your backups. The service is free, you only pay for the storage you use.

CloudBerry Linux

With CloudBerry I ran it from a docker image on my NUC. This meant I had access to some files that Hyper Backup could not access, which was good. Plus, you can backup to multiple different storage providers including Azure. Like CrashPlan it can do dedupe at the block level, compression, and allows you to specify your own encryption. Unlike CrashPlan it isn’t continuous (can do hourly), I could receive notification emails. One of the really neat features is that CloudBerry understands Azure storage tiers (hot, cold, and archive) and can manage the lifecycle with regards to those. However, while the files are encrypted in the blob storage (you can’t open them), they retain their folder structure and name. Additionally, the GUI isn’t great and I was getting a few errors. The service is not free ($30), and you pay for the storage you use.

Restic

I tried to use restic, but wasn’t able to ever get it to work. I tried to run it in a docker, but the CLI and I just never go along (no GUI). It can use different storage providers including Azure, and it can dedupe and encrypt. However, it can’t compress, which means backups will be larger. The service is free, you only pay for the storage you use.

Duplicacy

With Duplicacy I ran it from a docker image on my NUC. The web-UI was still in beta when I was testing it, but fundamentally it met my needs, plus had a functional CLI (basically the UI just uses the CLI anyways). This meant I had access to some files that Hyper Backup could not access, which was good. Plus, you can backup to multiple different storage providers including Azure. Like CrashPlan it can do dedupe at the block level, compression, and allows you to specify your own encryption. Unlike CrashPlan it isn’t continuous (can do 15 minutely), but I could receive notification emails. It’s also blazingly fast and can do dedupe across machines if I was backing up more than one. The service is not free ($10), and you pay for the storage you use.

Choosing

For each of the ones listed above (except for Restic simply because I couldn’t get it to go), I setup test storage accounts on my Azure account and began backing up the same 50GB with each product. The key things I was looking for was: easy of use and setup, time to backup on an hourly basis, storage and transactions consumed to get an idea of ongoing costs, and any issues I ran into.

Duplicati was the first to go simply because of the errors I was getting with it backing up the files. However, it was fast at 1:02 min for the incremental hourly scan and upload.

CloudBerry Linux was the next to go. This was due to it being more expensive to run (storage costs), a few errors, it was second to last in speed at 1:23, and the folder/file names listed above.

HyperBackup stuck it out the longest. Out of the box, it was definitely one of the easiest to setup. However, it was also the slowest to scan and backup (probably due to it running on the NAS and not on my NUC) a 1:32, and was uploading more data than Duplicacy. In order to have multiple copies, Hyper Backup would have to run 2 separate jobs that do the exact same thing.

Duplicacy is what I am now using. It is incredibly fast (0:16 in the test, and only 2-5 mins every hour to scan and upload with my 900GB actual backups), and had the best cost usage for Azure. Additionally, I can easily clone to another online provider without having to rerun the drive scan, it just copies the new backup chunks. I have also setup a versioning solution that runs weekly to prune the hourly snapshots. This is based on the same pruning schedule that CrashPlan was using, and I’m seeing negligible storage increases month over month. The biggest risk is that this it is a newer piece of software that may have some bugs/issues. As mentioned in the tl;dr, my restore has taken way longer than it should’ve due to improper retries and timeouts with Azure (all the data is there though, and I can access it anywhere I install the Duplicacy CLI), but otherwise I’ve been very happy and have actually cancelled my CrashPlan account.

Note: Technically using Azure is more expensive than if I had stuck with CrashPlan. My monthly storage costs for my backups storage account is $15-20. However, with credits, it works out to $0 for me. Plus, I’m now in more control of my backups than I was before, and I can choose what storage provider I want to use to minimize costs.

Thinking About Backups…Again

Well, it’s getting close to that time to re-evaluate backups as I think my $2.50/month backup plan is going away in July.

So far, there’s a few things I’ve looked at, but interested in what others are thinking (if anyone even reads this anymore).

  1. Glacier Backup (Synology)
  2. Hyper Backup (Synology)
  3. P5 Backup
  4. Cloud Sync (Synology)
  5. iDrive
  6. CloudBerry
  7. Duplicati
  8. Duplicacy

Some background – in CrashPlan my backup set is currently 1.3TB. However, a lot of that is versions.

Published
Categorized as computers

Migrated to CrashPlan for Small Business

Well, I’m doing it (migrating my CrashPlan account – see previous post with updates)!  This is primarily because I get the feeling the discount will disappear at the end of the month when they officially stop supporting home.  For those that haven’t gone through the steps, just taking screenshots as an FYI.  Additionally check out the other post as to how I’m managing non-NAS backups.

  1.  You get to pick which devices you want to migrate.  It will tell you very plainly how much and when your billing changes.  Depending on how many devices you pick, the number changes.  As mentioned before, I’m keeping my NAS backups, and that’s it.
  2. You update and add your info.
  3. It re-iterates your price.
  4. You agree to a bunch of stuff that they’ve already called out before.
  5. You enter your CC info and agree to auto-bill
  6. All done! (my client will be updated in the background…and on my device I didn’t migrate it updated as I was writing this)

The UI when you log into your account (same user/pass) is now way different/better than the home one.  Plus I get some of my storage back on my NAS due to it deleting computer-to-computer backups.

Published
Categorized as computers

CrashPlan leaving home market

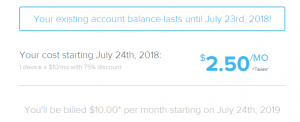
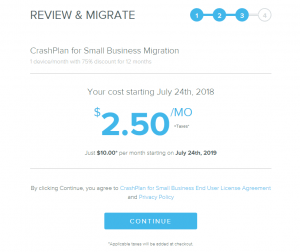
Boo, just got the email today that CrashPlan is leaving the home market.  After I don’t know how many years, it looks like I’ll have to find another provider.  It looks like there are a few, but with no computer-to-computer options baked in all will be a step back.  *sigh*

**Update 8/23/2017**

I’ve been following a lot of different threads on this.  Sadly, there are no direct competitors.  Turns out CrashPlan (even with the crappy Java app) was the best for a lot of reasons including the following:

  1. Unlimited – I am not a super heavy user with ~1TB of total storage spanning back for the last 10 years of use/versions, but it’s always nice to know it’s there.
  2. Unlimited versions – This is key and has saved my bacon a few times after a migration (computer/drive/other backup to NAS) and you think you have everything, but turns out you don’t until a year later when you’re looking for it.
  3. Family plan (i.e. more than one computer) – nice as I have 3 machines, plus my NAS that I can
  4. Peer-to-peer – one backup solution to rule them all that works on remote networks.  Unfortunately, it uses gross ports so doesn’t work anywhere (like in corporate places) and you can’t shove peer-to-peer backups to the cloud, those peers have to upload it directly.
  5. Ability to not backup on specific networks…like when I’m tethered to my phone.

Total sidebar, but speaking of crappy Java apps, I had just migrated to using a docker image of CrashPlan too due the continued pain of updating it with Patter’s awesome SPK.  Yay to running everything in docker now instead of native Synology apps.

My current setup consists of 3 Windows machines and a Synology NAS.  I had the CrashPlan family account so each of those machines would sync to the cloud, and all the windows machines would sync to the NAS.  Nothing crazy, and yes, I know I was missing a 3rd location for NAS storage for those following the 3-2-1 method.

The other cloud options I’ve looked at so far:

  • Carbonite – no linux client, so non-starter as that’s where I’d like to centralize my data.  I used to use them before CrashPlan and wasn’t a fan.  I know things change in 10 years, but…
  • Backblaze – I want to like Backblaze, but no linux client and limited versions (that they say they are working on – see comments section) keeps me away.  They do have B2 integrations via 3rd party backup/sync partners.  After doing some digging, they all look hard.  I have setup a CloudBerry docker image to play with later and see how good it could be.  Using B2 storage, it would be similar price as CrashPlan as I don’t have tons of data.
  • iDrive – Linux client (!) and multiple hosts, but only allows 32 versions, and dedupe seems to be missing so I’m not sure what that would mean for my ~1TB of data.  They have a 2TB plan for super cheap right now ($7 for the first year), which could fill all my needs.
  • CrashPlan Small Business – Same as home, but a single computer and no peer-to-peer.

So where does that leave me?  I’m hopefully optimistic about companies getting more feature parity, and thankfully my subscription doesn’t expire until July of 2018.  Therefore, while I’m doing some work, I’m firmly in the “wait and see” camp at this point.  However, if I were to move right now, this is what my setup would look like:

  • Install Synology Cloud Station Backup and configure the 3 Windows systems to backup to the Synology NAS.  Similar to CrashPlan, I can uPNP a port through the Firewall for external connectivity (I can even use 443 if I really want/need to).  This is my peer-to-peer backup and is basically like-for-like with Crashplan peer-to-peer.  This stores up to 32 versions of files, which while not ideal, is ok considering…
  • Upgrade to CrashPlan Small Business on the NAS.  While I’m not thrilled about the way this was handled, I understand it (especially seeing the “OMG I HAVE 30TB IN PERSONAL CRASHPLAN” redditor posts) and that means I don’t have to reupload anything.  Send both the Cloud Station Backups and other NAS data to CrashPlan.  This gets me the unlimited versions, plus I have 3-2-1 protections for my laptops/desktops.
  • Use Synology Cloud Sync (not a backup) or CloudBerry to B2 for anything I deem needs that extra offsite location for the NAS.  This would be an improvement to my current setup, and I could be more selective about what goes there to keep costs way down.

Hopefully this helps others, and I’ll keep updating this post based on what I see/move towards.  Feel free to add your ideas into the comments too.

Just saw this announcement from MSFT.  Could be an interesting archival strategy if tools start to utilize it – https://azure.microsoft.com/en-us/blog/announcing-the-public-preview-of-azure-archive-blob-storage-and-blob-level-tiering/

**Update 10/11/2017**

A quick update on some things that have changed.  I’ve moved away from Comcast, and now have Fiber!  That means, no more caps (and 1Gbps speeds), so I’m more confident to go with my ideas above.  So far this is what I’ve done:

  1. Setup Synology Cloud Backup.  To ensure I get the best coverage everywhere, I’ve created a new domain name and have mapped 443 externally to the internal synology software’s port.  When setting it up in the client, you need to specify <domain>:443, otherwise it attempts to use the default port (it even works with 2FA).  CPU utilization isn’t great on the client software, but that’s primarily because the filtering criteria is great (if you just add your Windows user folder, all the temp internet files and caches constantly get uploaded).  It would be nice if you could filter file paths too, similar to how CrashPlan does it – https://support.code42.com/CrashPlan/4/Troubleshooting/What_is_not_backing_up (duplicating below in case that ever goes away).  I’ll probably file a ticket about that and increasing the version limit…just because.
  2. I still have CrashPlan Home installed on most of my computers at this point as I migrate, but now that I know Synology backup works, I’ll start decommissioning it (yay to lots of java-stolen memory back!).
  3. I’ve played around with a cloudberry docker, but I’m not impressed.  I still want to find something else for my NAS stuff to maintain 3 copies (it would be <50GB of stuff).  Any ideas?

CrashPlan’s Windows Exclusions – based on Java Regex

.*/(?:42|\d{8,}).*/(?:cp|~).*
(?i).*/CrashPlan.*/(?:cache|log|conf|manifest|upgrade)/.*
.*\.part
.*/iPhoto Library/iPod Photo Cache/.*
.*\.cprestoretmp.*
.*/Music/Subscription/.*
(?i).*/Google/Chrome/.*cache.*
(?i).*/Mozilla/Firefox/.*cache.*
.*/Google/Chrome/Safe Browsing.* 
.*/(cookies|permissions).sqllite(-.{3})?

.*\$RECYCLE\.BIN/.*
.*/System Volume Information/.*
.*/RECYCLER/.*
.*/I386.*
.*/pagefile.sys
.*/MSOCache.*
.*UsrClass\.dat\.LOG
.*UsrClass\.dat
.*/Temporary Internet Files/.*
(?i).*/ntuser.dat.*
.*/Local Settings/Temp.*
.*/AppData/Local/Temp.*
.*/AppData/Temp.*
.*/Windows/Temp.*
(?i).*/Microsoft.*/Windows/.*\.log
.*/Microsoft.*/Windows/Cookies.*
.*/Microsoft.*/RecoveryStore.*
(?i).:/Config\\.Msi.*
(?i).*\\.rbf
.*/Windows/Installer.*
.*/Application Data/Application Data.*
(?i).:/Config\.Msi.*
(?i).*\.rbf
(?i).*/Microsoft.*/Windows/.*\.edb 
(?i).*/Google/Chrome/User Data/Default/Cookies(-journal)?", "(?i).*/Safari/Library/Caches/.*
.*\.tmp
.*\.tmp/.*


Published
Categorized as computers

INDEX MATCH Lookups in Excel

Yes, this is my world now, but in an effort to help others not waste time like I did…

If you are creating an INDEX MATCH formula in excel to do a multi-conditional VLOOKUP, Do NOT use tables or table columns.  If you do use them you will #N/A results. For whatever reason it only works with non-table arrays.

And there goes 2 hours of my life I will never get back.

*EDIT 5/15/2017*

Well, I was running Index(Match) for awhile, but my-oh-my is it a painful query.  Instead, for what I was doing, it’s just easier and faster to concatenate and vlookup.

Published
Categorized as work

HTTPS

Well, that was easy!  Lets Encrypt is pretty awesome, and just setup some permanent redirects along with HSTS.

New Hosting

Well, as my Azure credits will surely run out sometime soon from my MSDN account, I needed to find new hosting.  After a lot of searching for the right place, my new home is at TMD Hosting.

I didn’t want a full host to manage, and reading the reviews these are some of the best.  The import took a bit longer than anticipated (issues with the Softaculous script), but so far so good!

Next steps are to enable HTTPS via Lets Encrypt.