We may have had an issue with a young “midnight surfer” on the internet one night, and it has since taken me a wild ride of VLANs, schedules, traffic shaping, RADIUS servers and SSIDs. I’ll give a bit of an abbreviated journey so you can relive the fun, but the important takeaway is how to do MAC-based port authentication on the switch while also doing it on the WLAN, and having both have the same fallback VLAN.
TL;DR – Having DEFAULT Accept auth-type that assigns a specific VLAN, works for WLAN clients on Unifi APs but does not work for MAC-based authentication on Unifi Switches. This is regardless of specifying a fallback network in the switch configuration or not. Instead, you should use the fallback network in the switch config and scope the Default user to only authenticate for devices on the APs via a huntgroup.
So, have your last user in the user’s config file (i.e. the fallback) look like the following:
DEFAULT Huntgroup-Name == "<huntgroupname>", Auth-Type := Accept
  Tunnel-Type = VLAN,
  Tunnel-Medium-Type = IEEE-802,
  Tunnel-Private-Group-ID = "<vlanID>"
Instead of:
DEFAULT Auth-Type := Accept
  Tunnel-Type = VLAN,
  Tunnel-Medium-Type = IEEE-802,
  Tunnel-Private-Group-ID = "<vlanID>"
Back to our “midnight surfer” – I woke up one night to some giggling to find my son had decided to use an old phone we have to watch tiktok videos. I knew this day would come but was just surprised it had come so fast/soon. Good thing I have all the technology required to lock this down!
My home networking consists of the following equipment:
- 1 Qotom 6-port i5 mini-PC running pfSense Community Edition 2.6.0
- 1 Unifi US-16-150W (core) switch
- 1 Unifi U6-LR
- 2 Unifi U6-Lites
- 2 Unifi USW-Flex-Minis
Between the Qotom and the switch I have a 4-port link aggregation. Do I need 4Gbps between the router and the switch? Probably not, but I’m not using the ports anyways, and why not?! Additionally all the APs have a wired uplink to the switch.
Iteration 1 of the setup was to create 4 VLANs (Trusted, Guest, IoT, and Kids) and have them map to different SSIDs and manually specify the port VLAN on the switches – using a VLAN trunk for the wired APs and the link aggregation to the router. This setup was quick, easy, and worked! However, maintenance was a pain as I now had 3 new SSIDs that I needed to track the passwords for and getting devices onto the new network(s) – and any future devices – was a pain. Additionally, I use a wired connection for my work machine, but I also plug in my personal laptop to the same hub which connects to the same port. Yeah, I could use one of the USW-Flex-Minis and swap the connection the hub everytime, but let’s be honest – that’s annoying. Instead, I knew there had to be a better way.
Low and behold, there is – using a RADIUS server! Oh, and look at that, the incredibly powerful pfSense has a freeRADIUS package!
The initial configuration was pretty simple for wireless:
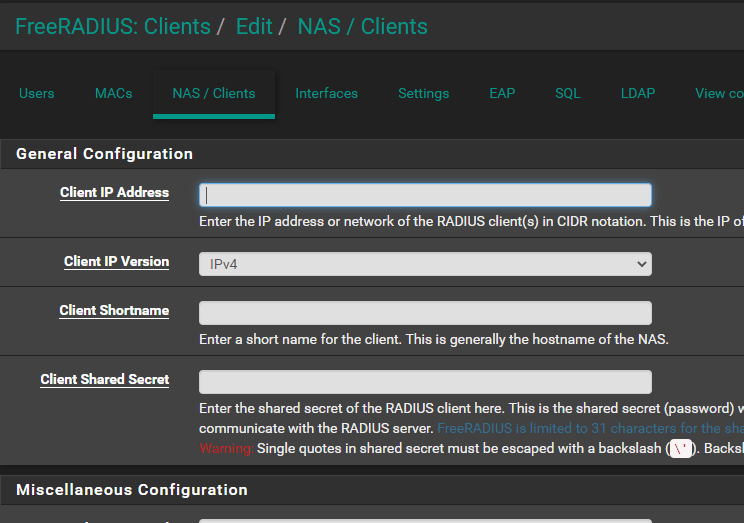
- Add the network devices (switch & APs) as NAS clients with a shared secret (same for all of them)
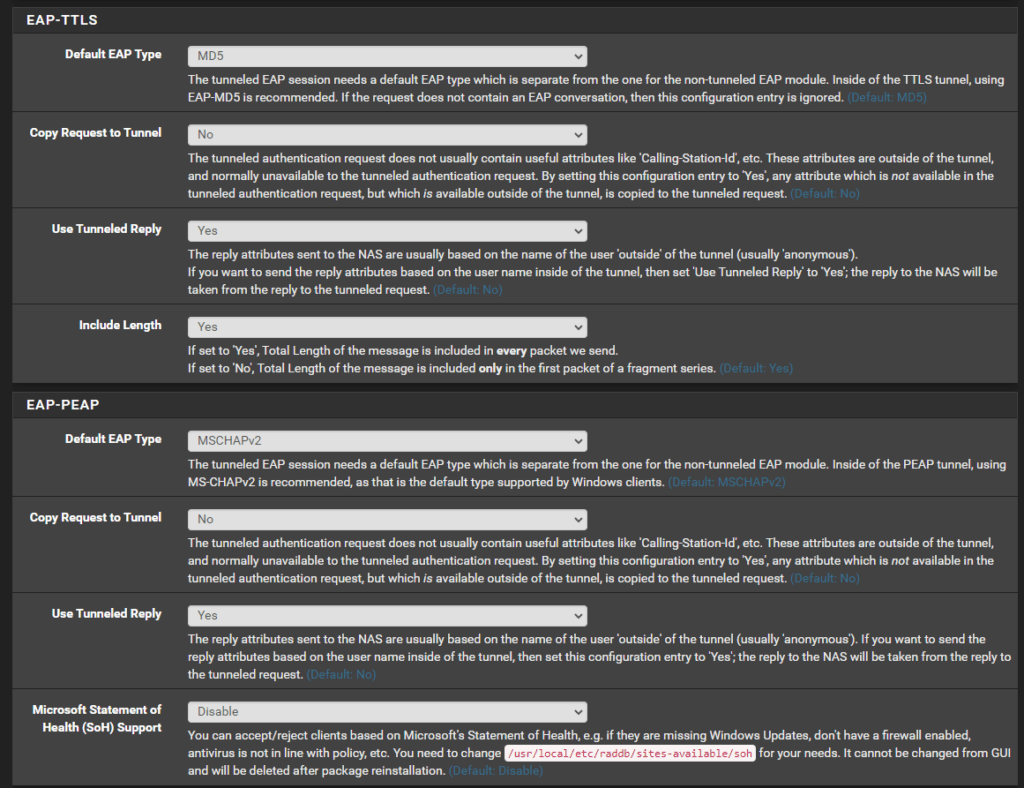
- Update the freeRADIUS EAP-TTLS and EAP-PEAP configuration to use tunneled reply and do not disable weak EAP types as that will cause the switch port MAC-based authentication to fail
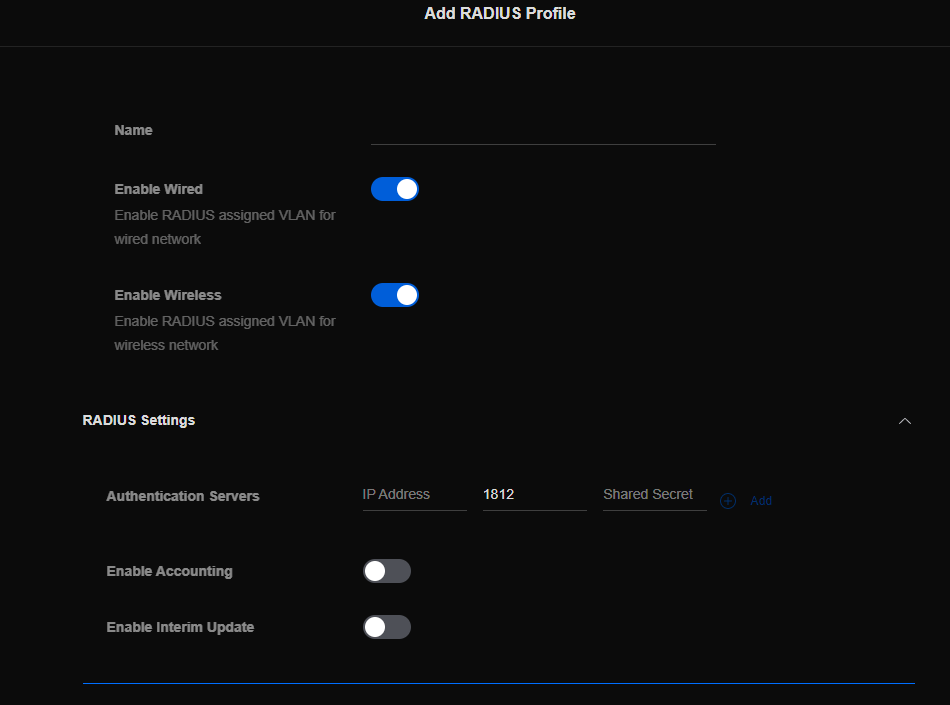
- Add a new RADIUS profile into the Unifi Controller that’s enabled for wired and wireless networks and specify the pfSense server as the auth server
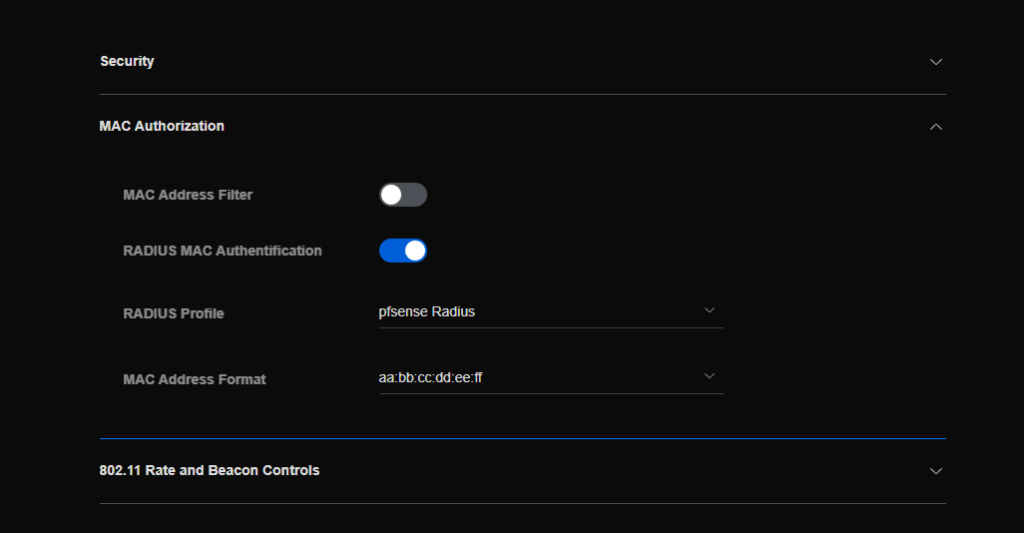
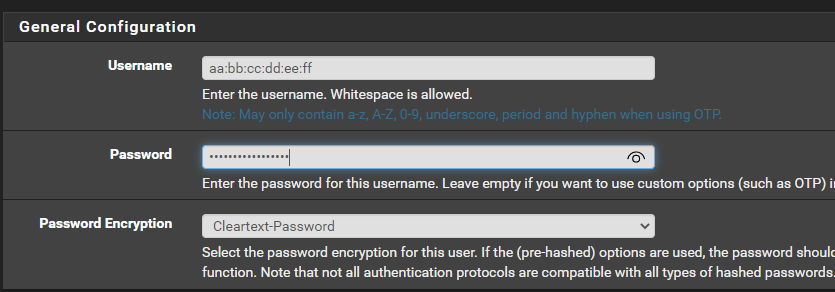
- Edit the wireless network to use RADIUS MAC Authentication. P.S., I highly recommend using the aa:bb:cc:dd:ee:ff format, because you can easily copy/paste from the device info in the Unifi Controller. Note that in the new UI (as shown) the wireless network will still have a Network defined. However, if you revert to the old UI, it will show “RADIUS assigned VLAN”.
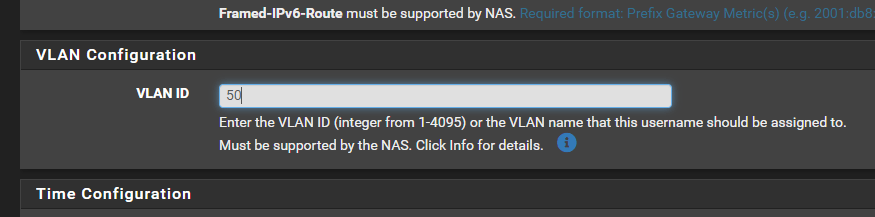
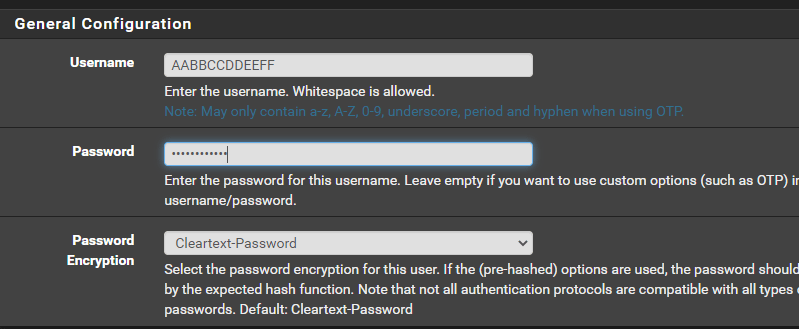
- Load up the list of users (i.e. the MAC addresses) in freeRADIUS – putting them on whatever VLAN you want (can also be blank!). Use the MAC address in the format you specified in step 3 as both the username and password are both the MAC.
Unfortunately, there is no fallback network/VLAN that you can define in the Unifi Controller for wireless networks. This is unfortunate and would’ve solved a lot of time later. However, you can define your own.
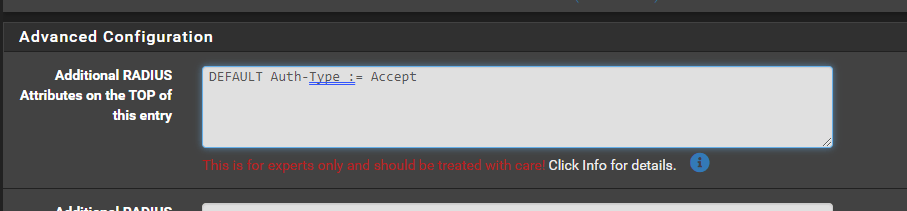
By default, if the user is not in the list, freeRADIUS will send a REJECT answer. However, we can enable a fallback user by setting the username and password as blank, specifying the fallback VLAN ID, adding “DEFAULT Auth-Type := Accept” to the top of this entry, and ensuring this client always the last user in the list as users are identified top-to-bottom.

After doing all that, I was able to move all my wireless clients back to the original SSID I had just moved them off of the previous weekend, and they still have the proper VLAN segregation. Woohoo!
Now, on to the switch ports – which was a multi-hour frustration, granted, it was late, and there was beer involved.
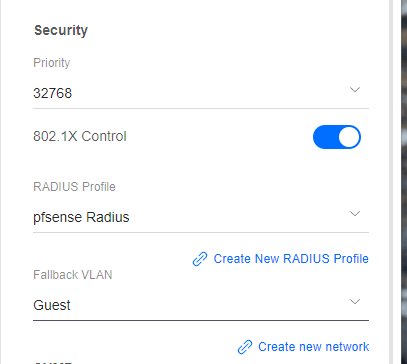
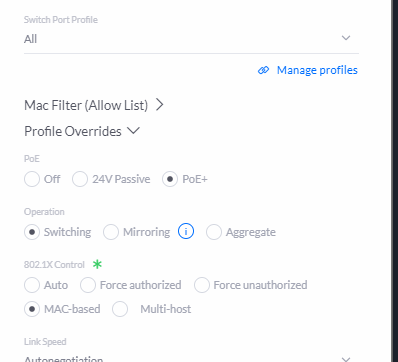
- Assuming that you enabled wired networks on the radius profile, you should be able to visit the switch settings > services and enable 802.1X Control, select the previously created RADIUS profile and the Fallback VLAN (Network). If you’re using a default port profile (All), all ports will use the 802.1X Control of “force authorize” – aka doesn’t really do anything with the auth and so there will be no impact. You’ll want to verify the port settings prior to enabling 802.1X control to ensure you don’t lock yourself out prior to creating all the users in the RADIUS server.
- Load up the list of users (i.e. the MAC addresses) in freeRADIUS – putting them on whatever VLAN you want (can also be blank!). The username and password are both the MAC address in the format of AABBCCDDEEFF.
- In the old Unifi Controller UI you can override profiles and so you need to change the individual port(s) to use “MAC-based” 802.1X control. Otherwise, you can create a new port profile and assign it to the port(s) in question.
Assuming you’ve added users in the RADIUS server for every MAC address on the network, it’ll all just work! Unfortunately, any MAC addresses that are picked up by the DEFAULT rule added in earlier, will not authenticate on the Unifi switch. The RADIUS server correctly authenticates the unknown MAC address and responds with the correct VLAN (as seen in the freeRADIUS logs), but the response message doesn’t contain all the same info which is probably why the switch doesn’t accept it.
To fix the failback you need to scope the DEFAULT user config to only be for your wireless APs. Once that is done, unknown clients to the RADIUS server from the switch will fail authentication and then the switch will use the Fallback VLAN you configured earlier on the switch config.
If you only have one AP, you can edit your DEFAULT user config directly as seen in the code snipped below by replacing <IPAddress> with the IP address of your AP:
DEFAULT NAS-IP-Address == <IPAddress>, Auth-Type := Accept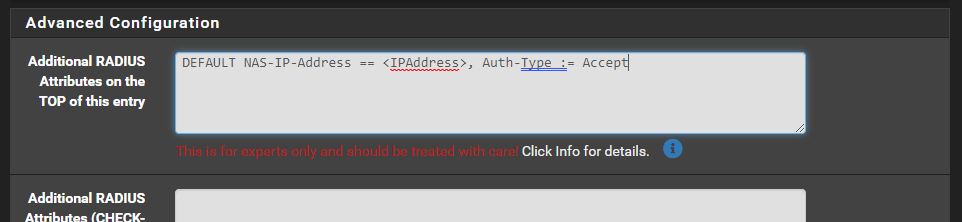
For more than 1 AP, it’s easier to create a huntgroup so you can reference all APs at once.
- SSH into your pfSense box
- Edit the /usr/local/etc/raddb/huntgroups file and create a new huntgroup as in the example, but with the IP Address(es) of your APs.
# huntgroups    This file defines the `huntgroups' that you have. A
#               huntgroup is defined by specifying the IP address of
#               the NAS and possibly a port.
#
#               Matching is done while RADIUS scans the user file; if it
#               includes the selection criteria "Huntgroup-Name == XXX"
#               the huntgroup is looked up in this file to see if it
#               matches. There can be multiple definitions of the same
#               huntgroup; the first one that matches will be used.
#
#               This file can also be used to define restricted access
#               to certain huntgroups. The second and following lines
#               define the access restrictions (based on username and
#               UNIX usergroup) for the huntgroup.
#

#
# Our POP in Alphen a/d Rijn has 3 terminal servers. Create a Huntgroup-Name
# called Alphen that matches on all three terminal servers.
#
#alphen         NAS-IP-Address == 192.0.2.5
#alphen         NAS-IP-Address == 192.0.2.6
#alphen         NAS-IP-Address == 192.0.2.7
#
# My home configuration
<huntgroupName>             NAS-IP-Address == <IPAddress1>
<huntgroupName>             NAS-IP-Address == <IPAddress2>
<huntgroupName> NAS-IP-Address == <IPAddress3>- Update the DEFAULT user config directly as seen in the code snipped below by adding in the <huntgroupName> to scope the DEFAULT rule as shown below
DEFAULT Huntgroup-Name == "<huntgroupName>", Auth-Type := Accept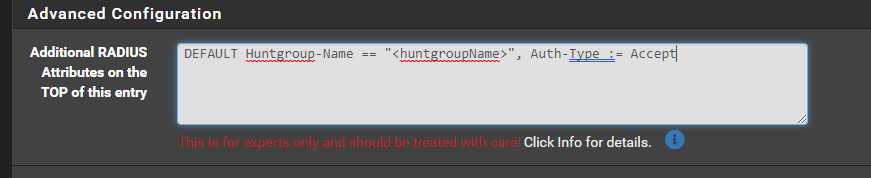
And…TADA! Now your wireless and wired devices all get tagged with an appropriate or fallback VLAN!
UPDATE: Grrr, after a freeradius update, it seems to have overwritten the huntgroups file. That made it super fun to have a failback – would really nice if Unifi APs would have a fallback VLAN by default.
References: