Synology NAS Recovery

After upgrading from my old Synology DS1511+ (yes, 12 years old) to a new Synology DS423+ (highly recommended!) and getting everything migrated, I wanted to wipe the machine to see if I can sell/donate it. It still works great, but I wanted to hard reset it to prepare it for a new owner. Needless to say it didn’t go according to plan, but figured I’d document it here.

As part of the upgrade, I had disconnected the old NAS to ensure there was nothing more I needed on it. It had been sitting in my office for about 3 weeks and I figured it was time to wipe it. I plugged it in, turned it on…and for some reason I couldn’t hit the website. Meh, no matter, I’ll just reset it via the button.

It reset and I was able to find it via find.synology.com and started the reconfigure of it. All worked well until it got to 95%…and sat there. I opened a new browser window and did the same thing…only to have it get stuck at 95% again. Life happened and so I left it there for awhile only to come back to the same issue. Ugh.

So I restarted it…

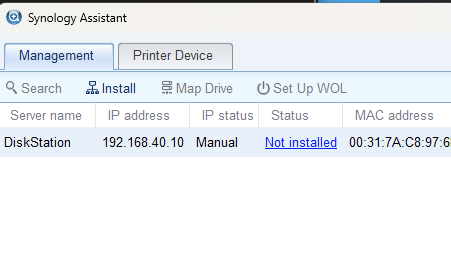
I was still unable to access it via the IP I saw it was getting. I also wasn’t able to find it on find.synology.com. So I attempted to find it via the downloadable Synology Assistant. At first I couldn’t find it there either (Yikes!), but then I realized I was crossing VLANS and the traffic was probably being blocked.

Ok, now I can at least see it, and low and behold DSM isn’t installed on it – so much for “95%”.

Should be easy at this point, just run the install and tada. Sadly, this is the error I continually received.

As part of the install process it prompts you to input both the networking configuration and the admin password prior to getting to this point. Seeing the error, I then telnet’ed into the machine, but the password I had set it to never worked.

Some searching later, I found a link that outlined the recovery password.

I’m putting the info below, in case that website goes away and is no longer available.
  • 1st character = month in hexadecimal, lower case (1=Jan, … , a=Oct, b=Nov, c=Dec)
  • 2-3 = month in decimal, zero padded and starting in 1 (01, 02, 03, …, 11, 12)
  • 4 = dash
  • 5-6 = day of the month in hex (01, 02 .., 0A, .., 1F)
  • 7-8 = greatest common divisor between month and day, zero padded. This is always a number between 01 and 12.

So, let’s say today is October 15, the password would be: a10-0f05 (a = month in hex, 10 = month in dec, 0f = day in hex, 05 = greatest divisor between 10 and 15).

In some cases the clock is also set to factory default… then try the password: 101-0101

Additionally, by default the TZ is in UTC, so account for that in the day.

The install logs are located at /var/log/messages, and cat’ing that I saw the following:

Feb 4 00:26:38 kernel: [ 3393.572368] ata3: SError: { HostInt 10B8B }
Feb 4 00:26:38 kernel: [ 3393.576648] ata3.00: failed command: READ FPDMA QUEUED
Feb 4 00:26:38 kernel: [ 3393.581931] ata3.00: cmd 60/20:00:00:00:00/00:00:00:00:00/40 tag 0 ncq 16384 in
Feb 4 00:26:38 kernel: [ 3393.581934] res 40/00:00:00:00:00/00:00:00:00:00/00 Emask 0x44 (timeout)
Feb 4 00:26:38 kernel: [ 3393.597037] ata3.00: status: { DRDY }
Feb 4 00:26:40 kernel: [ 3396.226915] ata3: limiting SATA link speed to 1.5 Gbps
Feb 4 00:26:42 kernel: [ 3398.543647] ata3.00: disabled
Feb 4 00:26:42 kernel: [ 3398.546712] ata3.00: device reported invalid CHS sector 0
Feb 4 00:26:43 kernel: [ 3398.565298] Descriptor sense data with sense descriptors (in hex):
Feb 4 00:26:43 kernel: [ 3398.594016] end_request: I/O error, dev sdc, sector 0
Feb 4 00:26:43 kernel: [ 3398.599194] Buffer I/O error on device sdc, logical block 0
Feb 4 00:26:43 kernel: [ 3398.604882] Buffer I/O error on device sdc, logical block 1
Feb 4 00:26:43 kernel: [ 3398.610580] Buffer I/O error on device sdc, logical block 2
Feb 4 00:26:43 kernel: [ 3398.610705] sd 2:0:0:0: rejecting I/O to offline device
Feb 4 00:26:43 kernel: [ 3398.610792] sd 2:0:0:0: rejecting I/O to offline device
Feb 4 00:26:43 kernel: [ 3398.610815] sd 2:0:0:0: rejecting I/O to offline device
Feb 4 00:26:43 kernel: [ 3398.610858] sd 2:0:0:0: rejecting I/O to offline device
Feb 4 00:26:43 kernel: [ 3398.638050] Buffer I/O error on device sdc, logical block 3
Feb 4 00:26:43 kernel: [ 3398.672656] sd 2:0:0:0: [sdc] START_STOP FAILED
Feb 4 00:26:43 syslog: format start, szBuf = ^R4VxSYNONI^A^D^A
Feb 4 00:26:43 syslog: ninstaller.c:1314 No found '/.raid_assemble', skip it
Feb 4 00:26:43 syslog: ninstaller.c:2235 CleanPartition=[0], CheckBadblocks=[0]
Feb 4 00:26:43 syslog: ninstaller.c:2296(ErrFHOSTDoFdiskFormat) retv=[0]
Feb 4 00:26:43 syslog: ErrFHOSTTcpResponseCmd: cmd=[2], ulErr=[0]
Feb 4 00:26:43 syslog: query prog, szBuf = ^R4VxSYNONI^A^D^A
Feb 4 00:26:43 syslog: ninstaller.c:2150(ErrFHOSTUpdateMkfsProgress) gInstallStage=[3] ret:-34
Feb 4 00:26:43 syslog: index=[0], ulRate=[8]
Feb 4 00:26:43 syslog: ninstaller.c:2221(ErrFHOSTUpdateMkfsProgress) retv=-34
Feb 4 00:26:43 syslog: ninstaller.c:1423(ErrFHOSTNetInstaller) read socket fail, ret=[0], errno=[2]
Feb 4 00:26:43 syslog: ninstaller.c:1512(ErrFHOSTNetInstaller) retSel=[1] err=(2)[No such file or directory]
Feb 4 00:26:43 syslog: ninstaller.c:1527(ErrFHOSTNetInstaller)
Feb 4 00:26:43 syslog: Return from TcpServer()
Feb 4 00:26:43 kernel: [ 3399.370817] md: md1: set sda2 to auto_remap [0]
Feb 4 00:26:43 kernel: [ 3399.401536] md: md0: set sda1 to auto_remap [0]
Feb 4 00:26:43 syslog: raidtool.c:166 Failed to create RAID '/dev/md0' on ''
Feb 4 00:26:43 syslog: raidtool.c:166 Failed to create RAID '/dev/md1' on ''
Feb 4 00:26:43 syslog: ninstaller.c:2249 szCmd=[/etc/installer.sh -n > /dev/null 2>&1], retv=[1]
Feb 4 00:26:43 syslog: ninstaller.c:2293 retv=[1]

Lots more searching of the some of the errors didn’t really get me any real answer, but I was able to find a forum post that seemed relevant that had a link to the web archive of a website that didn’t exist anymore. While that link was about a failed array, looking at my log files it appeared as if the installer couldn’t create the base RAID for a few drives.

While telnet’ed in, a look at my arrays returned with the following:

>cat /proc/mdstat
Personalities : [linear] [raid0] [raid1] [raid10] [raid6] [raid5] [raid4]
unused devices: <none>

At this point I tried various things with my drives. I removed them all and tried to run the install again, I tried with a single drive, multiple drives and so on to no avail. I even repartitioned one of the drives on my laptop to be “clean” and tried again. Sadly, none of these worked. Finally, with not much else to try, and after looking at the web archive article how they recreated the array, I decided to try and create it manually via the same tool.

Below is the what I ran and the associated output, which gave me something similar to what is shown in that article for those two arrays.

>mdadm -Cf /dev/md0 -n1 -l1 /dev/sda1
>mdadm -CF /dev/md1 -n1 -l1 /dev/sdb1
>cat /proc/mdstat
Personalities : [linear] [raid0] [raid1] [raid10] [raid6] [raid5] [raid4]
md1 : active raid1 sda2[0]
2097088 blocks [5/1] [U____]

md0 : active raid1 sda1[0]
2490176 blocks [5/1] [U____]

unused devices: <none>

I then attempted to run the install again, using the same static IP address as I had done before to keep my telnet connection alive, but no love. Quickly looking at the log and seeing similar issues about disk formatting, I figured it hadn’t worked.

Feb 4 00:36:03 kernel: [ 3958.866984] ata1: device unplugged sstatus 0x0
Feb 4 00:36:03 kernel: [ 3958.871556] ata1: exception Emask 0x10 SAct 0x0 SErr 0x4010000 action 0xe frozen
Feb 4 00:36:03 kernel: [ 3958.879115] ata1: irq_stat 0x00400040, connection status changed
Feb 4 00:36:03 kernel: [ 3958.885282] ata1: SError: { PHYRdyChg DevExch }
Feb 4 00:36:06 kernel: [ 3961.934818] ata1: limiting SATA link speed to 1.5 Gbps
Feb 4 00:36:08 kernel: [ 3963.663357] ata1: device plugged sstatus 0x1
Feb 4 00:36:13 kernel: [ 3969.024334] ata1: link is slow to respond, please be patient (ready=0)
Feb 4 00:36:18 kernel: [ 3973.721782] ata1: COMRESET failed (errno=-16)
Feb 4 00:36:20 kernel: [ 3975.681496] ata1.00: revalidation failed (errno=-19)
Feb 4 00:36:20 kernel: [ 3975.686574] ata1.00: disabled
Feb 4 00:37:03 syslog: format start, szBuf = ^R4VxSYNONI^A^D^A
Feb 4 00:37:03 syslog: ninstaller.c:1314 No found '/.raid_assemble', skip it
Feb 4 00:37:03 syslog: ninstaller.c:2235 CleanPartition=[0], CheckBadblocks=[0]
Feb 4 00:37:03 syslog: ninstaller.c:2296(ErrFHOSTDoFdiskFormat) retv=[0]
Feb 4 00:37:03 syslog: ErrFHOSTTcpResponseCmd: cmd=[2], ulErr=[0]
Feb 4 00:37:03 syslog: query prog, szBuf = ^R4VxSYNONI^A^D^A
Feb 4 00:37:03 syslog: ninstaller.c:2150(ErrFHOSTUpdateMkfsProgress) gInstallStage=[3] ret:-34
Feb 4 00:37:03 syslog: index=[0], ulRate=[9]
Feb 4 00:37:03 syslog: ninstaller.c:2221(ErrFHOSTUpdateMkfsProgress) retv=-34
Feb 4 00:37:03 syslog: ninstaller.c:1423(ErrFHOSTNetInstaller) read socket fail, ret=[0], errno=[2]
Feb 4 00:37:03 syslog: ninstaller.c:1512(ErrFHOSTNetInstaller) retSel=[1] err=(2)[No such file or directory]
Feb 4 00:37:03 syslog: ninstaller.c:1527(ErrFHOSTNetInstaller)
Feb 4 00:37:03 syslog: Return from TcpServer()
Feb 4 00:37:05 syslog: ninstaller.c:1199(ErrFHOSTTcpServer) bind port 9998 error (98):Address already in use
Feb 4 00:37:05 syslog: Return from TcpServer()

At this point, I decided as a last ditch effort to open a ticket with Synology. Knowing this thing was so out of support I put a bit of a cry for help at the beginning. But after creating the ticket, I looked more at the log file and realized it wasn’t complaining about the md0 and md1 anymore, and instead focused on the last item…”Address already in use”. Huh, weird.

So I reran the installation again, but picked the next open IP address and not the one that I had used previously…and to my great surprise it actually worked!

After a few reboots, I’m now back into the web UI! There was no volume that was created, but all 5 of my drives are up and running – which is good because I wanted to properly wipe them anyways. Yay!

Published
Categorized as synology

Longhorn, backups, and version control

**Update as of 1/05/24** I’ve move away from Longhorn. When it works, it works well, but when it does it’s insanely complex to troubleshoot. Plus, I don’t have a lot of storage on my nodes right now. Maybe when I do a node hardware refresh I’ll revisit.

I’ve been doing a bit of housekeeping on the home k8s cluster, and one of the things I’m doing is moving from microk8s to k3s. This isn’t really a post about that, but long story short, it’s because of how microk8s does a non-existant job of updating addons, and you basically have to use the DNS (coreDNS) addon as I could never get that to work as a normal helm chart (even with updating the kubelet config).

Anyways as part of that change, I need to create a new cluster, get longhorn running, and restore the volumes it was running in the old cluster. Thankfully, I had tested most of this prior to becoming reliant on longhorn, so I knew the backup and restore process worked well – just point the backTarget variable for longhorn on the new cluster to the same place as the old cluster and magic happens. Unfortunately, I ran into a snag.

The volume restored properly, and I was able to recreate the PVC with the same name, but the deployment kept complaining about it and my Influx DB wouldn’t mount the drive. It kept throwing the error

Attach failed for volume : CSINode does not contain driver driver.longhorn.io

This was super odd though, I could create a new PVC with the same longhorn StorageClass and it would mount. WTF?!

Well, lo-and-behold it was because when I built the new cluster, I decided to use the newest version of longhorn – 1.4.1 – as you do. However, the old cluster was still on 1.4.0, as were the backups. During any upgrades of longhorn, you must do an engine upgrade to the volume. Needless to say, the backups were on engine 1.4.0 (driver), but I only had 1.4.1 (driver) running as I was never prompted to upgrade the engine on the volume when restoring it. So yes, the error message was factual, if not incredibly frustrating.

So, note to self (and others) – when restoring a longhorn volume from backup, make sure you are running the same version as from when the backup was taken. Once the volume is successfully restored and running, you can then upgrade to the latest version via the update steps, and update the engine on the volume. Sadly, there didn’t appear to be a way to do that after the restore, and tbh I didn’t look to see what version was listed as the Engine Image after the restore. I’m just thankful it’s back up and running!

Published
Categorized as kubernetes

Degoogling Location Timeline with Owntracks

Over the past few years, I’ve been moving to more of a self-hosted model instead of using free services where I am the product (aka my data). After receiving my latest google timeline email, I realized this was a good next area to focus on. I had already set the auto-delete to any activity over 3 months, but I really do like seeing all that data. Hence my quest to find a replacement.

Ultimately I think I’ve landed on owntracks. This is primarily due to a few things a) decent updates b) a mobile app that only updates when it needs to…saving battery. I do feel as if I need to take another look at traccar, but the table is below – you can mix/match the clients and the backends to a certain extent:

ComponentProductProsCons
Client AppOverland– Pretty basic
– Reports based on location change
– Doesn’t seem to be updated anymore
Owntracks– Reports based on location change
– Friends/family function
– Map visualization
– Supports POST and MQTT
?
Traccar– Basic, no frills– Only does time-base reporting
BackendPhonetrack (NextCloud)– Already had nextcloud
– Lots of filtering and sharing features
– Nextcloud is clunky
– Only support POST
Owntracks– Supports POST and MQTT
– Containerized backend and frontend
– Recorder is complex for advanced usage
– Documentation is rough
Traccar– Supports lots of clients OOTB– Only supports POST
– PWA frontend not containerized

There’s a lot of complaints about how difficult it is to get Owntracks setup. I’m not going to lie, the documentation definitely leaves a bit to the reader to figure out. Once I’ve gotten my setup a bit more production ready I’ll probably post the code. In the interim, here are some quick things I learned along the way:

  • If you want to use HTTP POST method instead of MQTT on the Owntracks recorder, set OTR_PORT=0
  • For versions > 2.0 in eclipse mosquitto MQTT, you need to define a config file for accessing the broker from anywhere other than localhost
  • On the owntracks client, flipping between MQTT and HTTP changes all of the settings – including the locationDisplacement and locationInterval settings
  • When using MQTT, be sure to set the Tracker ID to something you want in the Identification section. Otherwise it defaults to something random
  • The owntracks script to import your Google Timeline doesn’t work anymore. See this PR for a working script. It appears as if they changed the timestamp name and/or no longer include the unix epoch timestamp anymore
  • Unless you want realtime tracking, you don’t need to expose your MQTT broker to the internet. The Owntracks client will buffer requests until it can sync.
  • Nginx-ingress controller allows exposing of TCP ports, but doesn’t have a way of securing them with TLS protections (via ACME/Let’s Encrypt automation)

Brother Printer using WLAN with Unifi APs

**Update April-ish 2023** So at some point in the past, the printer began falling off the network again. It lasted many months, but something changed (unifi firmware, printer firmware, who knows). The good news though is that I was able to fix it again for the time being!

I was noticing it was falling off at night, which was odd. The only thing going on at night was…Nightly Channel Optimizations. Well, in the latest Unifi Controller (I’m on 7.3.83), you have the ability to exclude specific APs from doing those optimizations. As I had tied the printer to the single AP, I just added that to the exclusion and…tada it’s been on the network for the last 29 days again. Talk about frustrating – this is totally a Brother Wifi thing as no other device in the house has this problem.

And back to the original article…


Having your printer continual to fall off WiFi is the worst. Whenever you actually want to print something, lo-and-behold, you can’t, and you need to spend 2-20 mins fiddling with it to get it back on the network. While all mine took was a printer restart for it to magically reconnect to wifi, this is always how I felt.

Office Space GIF by 20th Century Fox Home Entertainment - Find & Share on GIPHY

After enough frustration, I finally took some time to sit down and fix the problem. After a bit of searching, I stumbled upon this Brother article (granted I’m printing from a Windows PC and my specific printer is a Brother MFC-L2750DW). That at least gave me some hope, as I was using a single SSID for both 5Ghz and 2.4Ghz – you know, like a sane person.

With the above article in hand, I created a new SSID that was only on the 2.4Ghz with the following settings (Unifi Controller 7.0.23):

New UI:

  • Broadcasting APs: I have it set to just the 1 where closest to the printer
  • WiFi Band: 2.4Ghz
  • WiFi Type: Standard
  • Multicast Management:
    • Multicast Enhancement: ▢
    • Multicast and Broadcast Control: ▢
  • Client Device Isolation: ▢
  • Proxy ARP: ▢
  • BSS Transition: ▢
  • UAPSD: ▢
  • Fast Roaming: ▢
  • 802.11 DTIM Period: Auto
  • Minimum Data Rate Control: Auto
  • Security Protocol: WPA2
  • PMF: Optional
  • Group Rekey Interval: ▣ 3600 seconds
  • Hide WiFi Name: ▣

Legacy UI:

  • Security: WPA Personal
  • WiFi Band: 2.4Ghz
  • WPA3: ▢
  • Guest Policy: ▢
  • Broadcasting APs: I have it set to just the 1 where closest to the printer
  • Multicast and Broadcast Filtering: ▢
  • Fast Roaming: ▢
  • Hide SSID: ▣
  • Group Rekey Interval: GTK rekeying every 3600 seconds
  • UAPSD: ▢
  • Multicast Enhancement: ▢
  • RADIU DAS/DAC (CoA): ▢
  • Beacon Country: ▢
  • BSS Transition: ▢
  • TDLS Prohibit: ▢
  • Point to Point: ▢
  • P2P Cross Connect: ▢
  • Proxy ARP: ▢
  • L2 Isolation: ▢
  • Legacy Support: ▢
  • PMF: Optional
  • WPA Mode: WPA2 Only
  • DTIM Mode: Use Default Values
  • 2G Data Rate Control: ▣
    • 6Mbps
    • Disable CCK Rates: ▢
    • Also require clients to use rates at or above the specified value: ▢
    • Send beacons at 1Mbps: ▢

The printer has been online for over 20 days, whereas before it would fall off the network sometimes before it even fell asleep. 🎉🎉

Hopefully this helps someone else out there.

Published
Categorized as networking

pfSense, FreeRADIUS and Unifi MAC-based VLAN tagging with a fallback VLAN

We may have had an issue with a young “midnight surfer” on the internet one night, and it has since taken me a wild ride of VLANs, schedules, traffic shaping, RADIUS servers and SSIDs. I’ll give a bit of an abbreviated journey so you can relive the fun, but the important takeaway is how to do MAC-based port authentication on the switch while also doing it on the WLAN, and having both have the same fallback VLAN.

TL;DR – Having DEFAULT Accept auth-type that assigns a specific VLAN, works for WLAN clients on Unifi APs but does not work for MAC-based authentication on Unifi Switches. This is regardless of specifying a fallback network in the switch configuration or not. Instead, you should use the fallback network in the switch config and scope the Default user to only authenticate for devices on the APs via a huntgroup.

So, have your last user in the user’s config file (i.e. the fallback) look like the following:

DEFAULT Huntgroup-Name == "<huntgroupname>", Auth-Type := Accept
  Tunnel-Type = VLAN,
  Tunnel-Medium-Type = IEEE-802,
  Tunnel-Private-Group-ID = "<vlanID>"

Instead of:

DEFAULT Auth-Type := Accept
  Tunnel-Type = VLAN,
  Tunnel-Medium-Type = IEEE-802,
  Tunnel-Private-Group-ID = "<vlanID>"

Back to our “midnight surfer” – I woke up one night to some giggling to find my son had decided to use an old phone we have to watch tiktok videos. I knew this day would come but was just surprised it had come so fast/soon. Good thing I have all the technology required to lock this down!

My home networking consists of the following equipment:

Between the Qotom and the switch I have a 4-port link aggregation. Do I need 4Gbps between the router and the switch? Probably not, but I’m not using the ports anyways, and why not?! Additionally all the APs have a wired uplink to the switch.

Iteration 1 of the setup was to create 4 VLANs (Trusted, Guest, IoT, and Kids) and have them map to different SSIDs and manually specify the port VLAN on the switches – using a VLAN trunk for the wired APs and the link aggregation to the router. This setup was quick, easy, and worked! However, maintenance was a pain as I now had 3 new SSIDs that I needed to track the passwords for and getting devices onto the new network(s) – and any future devices – was a pain. Additionally, I use a wired connection for my work machine, but I also plug in my personal laptop to the same hub which connects to the same port. Yeah, I could use one of the USW-Flex-Minis and swap the connection the hub everytime, but let’s be honest – that’s annoying. Instead, I knew there had to be a better way.

Low and behold, there is – using a RADIUS server! Oh, and look at that, the incredibly powerful pfSense has a freeRADIUS package!

The initial configuration was pretty simple for wireless:

  1. Add the network devices (switch & APs) as NAS clients with a shared secret (same for all of them)
  1. Update the freeRADIUS EAP-TTLS and EAP-PEAP configuration to use tunneled reply and do not disable weak EAP types as that will cause the switch port MAC-based authentication to fail
  1. Add a new RADIUS profile into the Unifi Controller that’s enabled for wired and wireless networks and specify the pfSense server as the auth server
  1. Edit the wireless network to use RADIUS MAC Authentication. P.S., I highly recommend using the aa:bb:cc:dd:ee:ff format, because you can easily copy/paste from the device info in the Unifi Controller. Note that in the new UI (as shown) the wireless network will still have a Network defined. However, if you revert to the old UI, it will show “RADIUS assigned VLAN”.
  1. Load up the list of users (i.e. the MAC addresses) in freeRADIUS – putting them on whatever VLAN you want (can also be blank!). Use the MAC address in the format you specified in step 3 as both the username and password are both the MAC.

Unfortunately, there is no fallback network/VLAN that you can define in the Unifi Controller for wireless networks. This is unfortunate and would’ve solved a lot of time later. However, you can define your own.

By default, if the user is not in the list, freeRADIUS will send a REJECT answer. However, we can enable a fallback user by setting the username and password as blank, specifying the fallback VLAN ID, adding “DEFAULT Auth-Type := Accept” to the top of this entry, and ensuring this client always the last user in the list as users are identified top-to-bottom.

After doing all that, I was able to move all my wireless clients back to the original SSID I had just moved them off of the previous weekend, and they still have the proper VLAN segregation. Woohoo!

Now, on to the switch ports – which was a multi-hour frustration, granted, it was late, and there was beer involved.

  1. Assuming that you enabled wired networks on the radius profile, you should be able to visit the switch settings > services and enable 802.1X Control, select the previously created RADIUS profile and the Fallback VLAN (Network). If you’re using a default port profile (All), all ports will use the 802.1X Control of “force authorize” – aka doesn’t really do anything with the auth and so there will be no impact. You’ll want to verify the port settings prior to enabling 802.1X control to ensure you don’t lock yourself out prior to creating all the users in the RADIUS server.
  1. Load up the list of users (i.e. the MAC addresses) in freeRADIUS – putting them on whatever VLAN you want (can also be blank!). The username and password are both the MAC address in the format of AABBCCDDEEFF.
  1. In the old Unifi Controller UI you can override profiles and so you need to change the individual port(s) to use “MAC-based” 802.1X control. Otherwise, you can create a new port profile and assign it to the port(s) in question.

Assuming you’ve added users in the RADIUS server for every MAC address on the network, it’ll all just work! Unfortunately, any MAC addresses that are picked up by the DEFAULT rule added in earlier, will not authenticate on the Unifi switch. The RADIUS server correctly authenticates the unknown MAC address and responds with the correct VLAN (as seen in the freeRADIUS logs), but the response message doesn’t contain all the same info which is probably why the switch doesn’t accept it.

To fix the failback you need to scope the DEFAULT user config to only be for your wireless APs. Once that is done, unknown clients to the RADIUS server from the switch will fail authentication and then the switch will use the Fallback VLAN you configured earlier on the switch config.

If you only have one AP, you can edit your DEFAULT user config directly as seen in the code snipped below by replacing <IPAddress> with the IP address of your AP:

DEFAULT NAS-IP-Address == <IPAddress>, Auth-Type := Accept

For more than 1 AP, it’s easier to create a huntgroup so you can reference all APs at once.

  1. SSH into your pfSense box
  2. Edit the /usr/local/etc/raddb/huntgroups file and create a new huntgroup as in the example, but with the IP Address(es) of your APs.
# huntgroups    This file defines the `huntgroups' that you have. A
#               huntgroup is defined by specifying the IP address of
#               the NAS and possibly a port.
#
#               Matching is done while RADIUS scans the user file; if it
#               includes the selection criteria "Huntgroup-Name == XXX"
#               the huntgroup is looked up in this file to see if it
#               matches. There can be multiple definitions of the same
#               huntgroup; the first one that matches will be used.
#
#               This file can also be used to define restricted access
#               to certain huntgroups. The second and following lines
#               define the access restrictions (based on username and
#               UNIX usergroup) for the huntgroup.
#

#
# Our POP in Alphen a/d Rijn has 3 terminal servers. Create a Huntgroup-Name
# called Alphen that matches on all three terminal servers.
#
#alphen         NAS-IP-Address == 192.0.2.5
#alphen         NAS-IP-Address == 192.0.2.6
#alphen         NAS-IP-Address == 192.0.2.7
#
# My home configuration
<huntgroupName>             NAS-IP-Address == <IPAddress1>
<huntgroupName>             NAS-IP-Address == <IPAddress2>
<huntgroupName>             NAS-IP-Address == <IPAddress3>
  1. Update the DEFAULT user config directly as seen in the code snipped below by adding in the <huntgroupName> to scope the DEFAULT rule as shown below
DEFAULT Huntgroup-Name == "<huntgroupName>", Auth-Type := Accept

And…TADA! Now your wireless and wired devices all get tagged with an appropriate or fallback VLAN!

UPDATE: Grrr, after a freeradius update, it seems to have overwritten the huntgroups file. That made it super fun to have a failback – would really nice if Unifi APs would have a fallback VLAN by default.

References:

Kubernetes ‘exec’ DNS failure – Updated

UPDATE: While the below definitely works, the correct way to do this is to properly add a DNS suffix. This should be set in your DHCP configuration if your nodes are getting their IP info from DHCP. If you’re using static IP addresses, you should run the following commands on each node. Replace <ifname> with the name of your network interface (i.e. eno1, eth0, etc.) and <domain.name> with the domain suffix you want appended.

# This change is immediate, but not persistent
sudo resolvectl domain <ifname> <domain.name>
# This makes it permanent
## Turns out, this sets the global search domain, but still fails
## echo "Domains=<domain.name>" | sudo cat /etc/systemd/resolved.conf -
## Netplan is what is setting the interface info, so be sure to edit its configuration
sudo sed -i 's|search: \[\]|search: \[ <domain.name> \]|' /etc/netplan/<netplan file>

From https://askubuntu.com/a/1211705


I have finally migrated all of my containers from my docker-ce server to kubernetes (microk8s server). The point was so that I could wipe the docker-ce server and make a microk8s cluster – which has been done and was super easy!

However, after getting the cluster setup I wasn’t able to exec into certain pods from a remote machine with kubectl. The error I was getting was below:

Error from server: error dialing backend: dial tcp: lookup <node-name>: Temporary failure in name resolution

As I had originally only had a single node, my kubectl config referenced the original nodes IP address directly. Additionally, I noticed that this error happened when the pod was located on the node that wasn’t the api server I was accessing. By changing my kube config api server to the node that hosted the pod, it then worked.

After a lot of playing with kube-dns and coredns, it really came down to something easy/obvious. When I was on one node, I couldn’t resolve the shortname of the other node, and therefore node1 couldn’t proxy to node2 to run the exec.

While there are multiple ways I could have fixed this (and I did get the right DNS suffixes added to DHCP too), I ended up editing the /etc/hosts on each node and ensuring there was an entry for the other node. Tada, exec works across nodes now.

Using Kubernetes Ingress for non-K8 Backends

TL;DR – Make sure you name your ports when you create external endpoints.

In my home environment, I need a reverse proxy that serves all port 80 and 443 requests and can interface easily with LetsEncrypt to ensure all those endpoints are secure. Originally I’ve been using Docker and Jwilder’s nginx proxy to support all these. As it’s just using nginx, you can use it to send stuff to backends that aren’t in docker pretty easily (like the few physical things that aren’t in docker). However, I’ve been transitioning over to Kubernetes and need a similar way to have a single endpoint on those ports that all services can use.

Well, the good news is that the the internet is awash of articles about this. However, after attempting to implement any of them, I was consistently getting 502 errors – no live upstreams. This was happening on a Ubuntu 20.04 LTS system running microk8s v1.19.5.

My original endpoint, service, and ingress configs were the following:

apiVersion: v1
kind: Endpoints
metadata:
  name: external-service
subsets:
  - addresses:
      - ip: <<IP>>
    ports:
      - port: <<PORT>>
        protocol: TCP
---
apiVersion: v1
kind: Service
metadata:
  name: external-service
spec:
  ports:
    - name: https
      protocol: TCP
      port: <<PORT>>
---
apiVersion: networking.k8s.io/v1
kind: Ingress
metadata:
  name: external-ingress
  annotations:
    kubernetes.io/ingress.class: "nginx"    
    cert-manager.io/cluster-issuer: letsencrypt-prod
    cert-manager.io/acme-challenge-type: http01
    nginx.ingress.kubernetes.io/backend-protocol: "HTTPS"
spec:
  tls:
  - hosts:
    - external.rebelpeon.com
    secretName: external-prod
  rules:                           
  - host: external.rebelpeon.com
    http:
      paths:
      - path: /
        pathType: Prefix
        backend:
          service:
            name: external-service
            port: 
              number: <<PORT>>

This yaml deployed successfully, but as mentioned did not work. With it deployed, when describing the Endpoint:

$ kubectl describe endpoints -n test
Name:         external-service
Namespace:    test
Labels:       <none>
Annotations:  <none>
Subsets:
  Addresses:          <<IP>>
  NotReadyAddresses:  <<none>
  Ports:
    Name     Port  Protocol
    ----     ----  --------
    <unset>  443   TCP

Events:  <none>

When describing the service:

$ kubectl describe services -n test
Name:              external-service
Namespace:         test
Labels:            <none>
Annotations:       <none>
Selector:          <none>
Type:              ClusterIP
IP Families:       <none>
IP:                10.152.183.182
IPs:               <none>
Port:              https  443/TCP
TargetPort:        443/TCP
Endpoints:
Session Affinity:  None
Events:            <none>

Wait a minute, the service lists the endpoints as being blank – not undefined or properly defined as others. When I describe the endpoint of a working K8-managed endpoint, I see that the port has a name, and that’s the only difference.

$ kubectl describe endpoints -n test
Name:         external-service
Namespace:    test
Labels:       <none>
Annotations:  <none>
Subsets:
  Addresses:          <<IP>>
  NotReadyAddresses:  <none>
  Ports:
    Name   Port  Protocol
    ----   ----  --------
    https  443   TCP

So, I changed my config to the following (one line change):

apiVersion: v1
kind: Endpoints
metadata:
  name: external-service
subsets:
  - addresses:
      - ip: <<IP>>
    ports:
      - port: <<PORT>>
        protocol: TCP
        name: https
---
apiVersion: v1
kind: Service
metadata:
  name: external-service
spec:
  ports:
    - name: https
      protocol: TCP
      port: <<PORT>>
---
apiVersion: networking.k8s.io/v1
kind: Ingress
metadata:
  name: external-ingress
  annotations:
    kubernetes.io/ingress.class: "nginx"    
    cert-manager.io/cluster-issuer: letsencrypt-prod
    cert-manager.io/acme-challenge-type: http01
    nginx.ingress.kubernetes.io/backend-protocol: "HTTPS"
spec:
  tls:
  - hosts:
    - external.rebelpeon.com
    secretName: external-prod
  rules:                           
  - host: external.rebelpeon.com
    http:
      paths:
      - path: /
        pathType: Prefix
        backend:
          service:
            name: external-service
            port: 
              number: <<PORT>>

And, tada everything works! I can now access physical hosts outside of K8 via the K8 ingress! Sadly, that took about 4 hours of head bashing-in to realize…

Surface Keyboard going to Sleep

I’ve been fighting this for awhile (as have a few others based on some google searches), and now that I have it resolved I figured I’d post it here.

High level, I’ve had a Surface Ergonomic Keyboard for awhile, and absolutely love it. However, recently I upgraded from a Surface Pro 5 to a Surface Pro 7 and the keyboard keeps going to sleep – taking forever to wake back up. I’ve been on calls, just hammering the windows key to get it to wake up. Needless to say it’s been super annoying as waiting for 30 seconds or more for your keyboard to start responding again is not ideal for productivity (or sanity).

I’ve seen a few places that I just need to turn off the “allow the computer to turn off this device to save power”. However, it took me a bit to figure out which one. Turns out it’s not until you select Change settings that you can see the Power Management tab in device hardware. So without further ado…

Open Control Panel

Select View devices and Printers (or if your control panel lists all the icons, select Devices and Printers).

Select properties of the Ergonomic Keyboard and go to the Hardware tab

Select Bluetooth Low Energy GATT compliant HID device and select Properties

Click the Change settings button- tada Power Management tab!

Select the Power Management tab, unselect Allow the computer to turn off this device to save power and click the OK buttons until you are back at the devices and printers screen. Yay, now it doesn’t go to sleep!

If for some reason you still don’t see the Power Management tab, you can do the following actions:

  1. Launch your Registry Editor (Windows button and type “Regedit“)
  2. Navigate to: “Computer\HKEY_LOCAL_MACHINE\SYSTEM\CurrentControlSet\Control\Power
  3. Select the entry (or Create a DWORD (32-bit) Value) called ‘CsEnabled
  4. Change the “Value data” to “0” (BaseHexadecimal) and select “OK
  5. Reboot your machine
Published
Categorized as computers

WireGuard

I’ve been using OpenVPN for a few things and I’ve been very interested in setting up WireGuard instead as it has a lot less overhead and is less cumbersome than OpenVPN. Well I finally took the plunge last night and it was surprisingly easy after only a few missteps!

One of my use cases is to tunnel all traffic to the VPN server, so it appears as if my internet traffic originates from the VPN server. Here is how I set it up (with thanks to a few other articles).

On the Server (Ubuntu 18.04 LTS)

Install WireGuard on the server. I am running Ubuntu 18.04 and so I had to add the repository.

Move to the /etc/wireguard directory (you may need to sudo su)

Generate the public and private keys by running the following commands. This will create two files (privatekey and publickey) in the /etc/wireguard so you can re-reference them while building out the config.

$ umask 077  # This makes sure credentials don't leak in a race condition.
$ wg genkey | tee privatekey | wg pubkey > publickey

Create the server config file (/etc/wireguard/wg0.conf). Things to note:

  1. The IP space used is specifically reserved for a shared address space per RFC6598
  2. I only care about IPv4. It is possible to add IPv6 address and routing capabilities into the configuration
  3. For routing, my server’s local interface name is eth0.
  4. You can choose any port number for ListenPort, but note that it is UDP.
  5. Add as many peer sections as you have clients.
  6. Use the key in the privatekey file in place of <Server Private Key>. Wireguard doesn’t support file references at this time.
  7. We haven’t generated the Client public keys yet, so those will be blank.
[Interface]
Address = 100.62.0.1/24
PostUp = iptables -t nat -A POSTROUTING -o eth0 -j MASQUERADE
PostDown = iptables -t nat -D POSTROUTING -o eth0 -j MASQUERADE
ListenPort = 51820
PrivateKey = <Server Private Key>

[Peer]
PublicKey = <Client1 Public Key>
AllowedIPs = 100.62.0.2/32

[Peer]
PublicKey = <Client2 Public Key>
AllowedIPs = 100.62.0.3/32

Test the configuration with wg-quick

root@wg ~# wg-quick up wg0
[#] ip link add wg0 type wireguard
[#] wg setconf wg0 /dev/fd/63
[#] ip address add 100.62.0.1/24 dev wg0
[#] ip link set mtu 1420 up dev wg0

Remove the interface with wg-quick

root@wg ~# wg-quick down wg0
[#] ip link delete dev wg0

Use systemd service to start the interface automatically at boot

systemctl start wg-quick@wg0
systemctl enable wg-quick@wg0

To forward traffic of the client through the server, we need to enable routing on the server

echo "net.ipv4.ip_forward = 1" > /etc/sysctl.d/wg.conf
sysctl --system

On the Client (Android)

  1. Install the WireGuard App from the Play store
  2. Open the app and create a new profile (click the +)
  3. Create from scratch (you could move a pre-created config file too)
    1. Give the interface a name
    2. Generate a private key
    3. Set the address to the address listed in the peer section of your server config – 100.62.0.2/32
    4. (Optionally) Set DNS servers as your local DHCP servers will no longer work as all packets will encrypted and sent across the VPN
    5. Click Add Peer
      1. Enter the Server’s public key
      2. Set Allowed IPs to 0.0.0.0/0 to send all traffic across the VPN
      3. Set the endpoint to the IP address you’ll access the server on, along with the port (i.e. <InternetIP/Name>:51820)

Revisit the Server Config

Now that the client has a public key, you need to update /etc/wireguard/wg0.conf

[Peer]
PublicKey = <INSERT PUBLIC KEY>
AllowedIPs = 100.62.0.2/32 

Restart the wireguard service

systemctl restart wg-quick@wg0 

Connect to the Server from the Client

Within the wireguard app, enable the VPN.

You can validate by visiting ipleak.net to verify that traffic is going through the VPN.

Edge Beta to Stable

As you may know, the new Edge based on Chromium went stable last week. Unfortunately, there is no automated way to move any of your settings from the Beta channel to Stable. That means, for those of us that were using the beta, you need to re-setup everything in stable.

However, as it is based on Chromium, all the information is stored in a profile (or multiple profiles). That means you can move all your profile data from the Beta folder to the stable folder. I did this and the only issue I ran into was if you run multiple profiles that use custom images, the taskbar profile icon will retain the “BETA” tag as those icons are generated during profile creation and stored in the profile location. Unfortunately, deleting the icon in the profile folder does not seem to reset the icon.

Stable Microsoft Edge
%LocalAppData%\Microsoft\Edge\User Data

Microsoft Edge Beta
%LocalAppData%\Microsoft\Edge Beta\User Data

UPDATE – If you have edge profiles assigned to a Microsoft account where your image is from O365 or another account, I found a way where you can regen the taskbar icons after doing the above steps.

Just go to edge://settings/profiles and sign out of the account and then sign back in and it will recreate the profile icons. Make sure you do not check the box to clear all your settings though! For profiles not linked to a Microsoft, just change the profile image.

Tada!